Monday, March 31, 2014
Mango Jam starring in Saturday Morning Breakfast for One
THE MAGICAL MILLION
While I was waiting for the magic one millionth hit to happen, it came and went without my knowledge and now it is a million plus some 7000, but thank you my dear readers, friends, family for encouraging me and keeping me going at this blog.
Heres to a million more :)
(My posts dont seem to be appearing on the Taste of India feed list, so please subscribe to the feed on your favourite reader or by email)
Im back home, after spending two weeks with my parents. They live in the same city as me, an hours drive at most times. But I have rarely stayed this long. One weeks stay got extended by another week thanks to a nasty cold which they didnt want me to nurse myself as DH was out traveling. Needless to say, I hardly cooked in the last two weeks,had hogged a lot of traditional lunches, and just lazed and lazed. Since I was getting back to an empty house last afternoon, I had planned for two of my friends to come over and spend the night. No cooking involved, just ordered in a couple of pizzas!
This morning, I was looking forward to having a relaxed breakfast with my favourite Saturday newspaper - Lounge (Mint). Having purchased some luscious Kesar mangoes yesterday, I thought of making some instant mango jam in the microwave, just while the bread slices were toasting on the tava and the Amul butter sitting near the stove to soften.

Initially I did think of searching some blogs for a recipe, but then the laziness of a Saturday morning prevented me from even starting my laptop. It is a mango after all, and nothing much can go wrong - so saying, I put together one chopped mango, pinch of salt, fat pinch of black pepper and a spoonful of organic jaggery powder in a glass bowl, and started nuking at high power starting with 2 minutes, kept giving 2 minute increments, and after the 6th minute it was nearly done. The jam had firmed up and yet some of the pieces held their shape, which is how I like it.
In a total of seven minutes, I had a delicious jam, bursting with flavours ready to spread itself over nicely crisped up toast spread with Amul butter.
If you still want a proper recipe, here it is.

Instant Mango Jam
Serves 2 - or enough for 5-6 pieces of toast
Time taken - Under 10 minutes
You need
1 sweet mango like Kesar - fine diced (almost a cup of cubes)
1 generous tsp jaggery powder or brown sugar ( I used Fabindias Desi Sakkar - Organic Jaggery)
1 pinch salt
1/4 tsp ground black pepper
Combine all the above in a microwave safe glass bowl.
Nuke at high for a total of 6-7 minutes, giving it a stir 3-4 times in between.
The jam is ready when it comes together and most of the liquid has dried up.
Notes:
You can add cardamom powder or cinnamon powder instead of black pepper. I liked the salt and pepper combo going with the sweet mango taste.
If your mango doesnt have that tangy edge, you can also squeeze a few drops of lime.
You can try this with larger quantities, since this is my first try, I used just one mango. Since it is ready in a jiffy, it can be made as and when you need it.
A thinner version of this will taste yummy on some plain pancakes.
This is my entry to May Mango madness edition of Weekend Breakfast Blogging (#22) which Arundati is hosting at Escapades. Send in your entries to her by the 31st :)
Read More..
While I was waiting for the magic one millionth hit to happen, it came and went without my knowledge and now it is a million plus some 7000, but thank you my dear readers, friends, family for encouraging me and keeping me going at this blog.
Heres to a million more :)
(My posts dont seem to be appearing on the Taste of India feed list, so please subscribe to the feed on your favourite reader or by email)
Im back home, after spending two weeks with my parents. They live in the same city as me, an hours drive at most times. But I have rarely stayed this long. One weeks stay got extended by another week thanks to a nasty cold which they didnt want me to nurse myself as DH was out traveling. Needless to say, I hardly cooked in the last two weeks,
This morning, I was looking forward to having a relaxed breakfast with my favourite Saturday newspaper - Lounge (Mint). Having purchased some luscious Kesar mangoes yesterday, I thought of making some instant mango jam in the microwave, just while the bread slices were toasting on the tava and the Amul butter sitting near the stove to soften.
Initially I did think of searching some blogs for a recipe, but then the laziness of a Saturday morning prevented me from even starting my laptop. It is a mango after all, and nothing much can go wrong - so saying, I put together one chopped mango, pinch of salt, fat pinch of black pepper and a spoonful of organic jaggery powder in a glass bowl, and started nuking at high power starting with 2 minutes, kept giving 2 minute increments, and after the 6th minute it was nearly done. The jam had firmed up and yet some of the pieces held their shape, which is how I like it.
In a total of seven minutes, I had a delicious jam, bursting with flavours ready to spread itself over nicely crisped up toast spread with Amul butter.
If you still want a proper recipe, here it is.
Instant Mango Jam
Serves 2 - or enough for 5-6 pieces of toast
Time taken - Under 10 minutes
You need
1 sweet mango like Kesar - fine diced (almost a cup of cubes)
1 generous tsp jaggery powder or brown sugar ( I used Fabindias Desi Sakkar - Organic Jaggery)
1 pinch salt
1/4 tsp ground black pepper
Combine all the above in a microwave safe glass bowl.
Nuke at high for a total of 6-7 minutes, giving it a stir 3-4 times in between.
The jam is ready when it comes together and most of the liquid has dried up.
Notes:
You can add cardamom powder or cinnamon powder instead of black pepper. I liked the salt and pepper combo going with the sweet mango taste.
If your mango doesnt have that tangy edge, you can also squeeze a few drops of lime.
You can try this with larger quantities, since this is my first try, I used just one mango. Since it is ready in a jiffy, it can be made as and when you need it.
A thinner version of this will taste yummy on some plain pancakes.
This is my entry to May Mango madness edition of Weekend Breakfast Blogging (#22) which Arundati is hosting at Escapades. Send in your entries to her by the 31st :)
Tags:
THANKSGIVING MINI DESSERT
We just love mini desserts, dont you? No extra plates and forks (we use napkins), no "commitment" to a big slice of something; instead two or three different mini-desserts is more to our liking.
Todays recipe is a combination of two of my favorite holiday treats. It has a bottom layer of moist, spicy pumpkin CAKE and a top layer of rich and creamy CHEESECAKE; what could be better for your holiday buffet table?

ASSEMBLY
Super simple: place cupcake papers in cupcake pan and very lightly mist them with cooking spray.
Put a slightly rounded tablespoon of cake batter into each paper and make sure it covers the bottom. Top with cheesecake filling(dividing evenly between the 12 desserts).
Bake in pre-heated 350° oven for 25 minutes or until set (my electric oven takes exactly 25 minutes).
Cool to room temperature then chill for at least a couple hours.
 NOTE: These little gems can be made two or three days ahead of time which is a huge help during the holidays. As a matter of fact, they taste even more moist after a couple days in the fridge. Just make sure that you store them chilled in an airtight container.
NOTE: This recipe makes 12 mini-desserts, but you can double it if need be.
Read More..
Todays recipe is a combination of two of my favorite holiday treats. It has a bottom layer of moist, spicy pumpkin CAKE and a top layer of rich and creamy CHEESECAKE; what could be better for your holiday buffet table?
CAKE LAYER
1/2 cup Libby pumpkin puree (NOT the pre-spiced kind)
3/4 cup all purpose flour
1 1/2 teaspoons pumpkin pie spice
1/4 teaspoon salt
1/4 teaspoon baking soda
1 large egg
1/2 cup sugar
1/4 cup + 1 tablespoon vegetable oil
1 teaspoon vanilla extract
Mix the flour, spice, salt and baking soda and set aside. In another bowl, whisk together the pumpkin, egg, sugar, oil and vanilla until smooth, then add the dry ingredients from the first bowl. Whisk just until well mixed and set aside.
CHEESECAKE LAYER
8 ounces cream cheese (room temperature)
1 large egg
2 teaspoons all purpose flour
1 cup powdered sugar
1 teaspoon vanilla
Beat the cream cheese with electric mixer until smooth, then add the egg, flour, sugar and vanilla and beat until smooth, but dont over beat.ASSEMBLY
Super simple: place cupcake papers in cupcake pan and very lightly mist them with cooking spray.
Put a slightly rounded tablespoon of cake batter into each paper and make sure it covers the bottom. Top with cheesecake filling(dividing evenly between the 12 desserts).
Bake in pre-heated 350° oven for 25 minutes or until set (my electric oven takes exactly 25 minutes).
Cool to room temperature then chill for at least a couple hours.
NOTE: This recipe makes 12 mini-desserts, but you can double it if need be.
My Top Ten Highlights from the Food Wine Classic
 I had to narrow down like two-dozen things to do it, but Ive finally posted a top ten list for my favorite Food & Wine Classic experiences. The four days were a blur of amazing food, wonderful wine, and a truly unforgettable cast of culinary characters, so choosing a top ten list was not easy. If youre so inclined, you can read the article on my About.com American Food site.
Ive been reading lots of similar recaps on other food blogs, and except for a few exceptions (everyone loved Jose Andres barbecue), these post-Classic reviews are as varied as the food itself. And, you wonder why these star chefs are so high strung?
 Tomorrow at some point Ill be uploading a super delicious video recipe for lamb shoulder braised in root beet and toasted sesame. The recipe was adapted from the one I saw Richard Blais make in one of the cooking demos I attended.
He served it with a scoop of coleslaw ice cream, but unfortunately Im fresh out of liquid nitrogen, so youll just have to settle for the lamb, Stay tuned!
Sunday, March 30, 2014
Pears for AFAM
While I am deciding what to do with the pears for A Fruit a Month, hosted by my friend Raaga of The Singing Chef, here are a couple of varieties weve enjoyed eating - the brown organic pears, apart from the crisp Indian pears and the Chinese variety.

Although we like to support the locally grown varieties, the Red Anjou is an eye catcher. It costs almost double that of the Indian pears, but the red skin makes it a beauty especially in recipes like this one. I had tried this recipe with the regular green pears, but these red beauties are begging me to have a go at it again...let me see if I oblige!
 While this one was labelled as brown organic pear, it is also known as the Nashi pear or Asian pear. More about this here. However, the wiki link wrongly calls this one Nashpati in India, which is a different variety altogether.
Read More..
Although we like to support the locally grown varieties, the Red Anjou is an eye catcher. It costs almost double that of the Indian pears, but the red skin makes it a beauty especially in recipes like this one. I had tried this recipe with the regular green pears, but these red beauties are begging me to have a go at it again...let me see if I oblige!
While this one was labelled as brown organic pear, it is also known as the Nashi pear or Asian pear. More about this here. However, the wiki link wrongly calls this one Nashpati in India, which is a different variety altogether.Tags:
Tomato Ka Shorba Arabian
This is a famous Arabian soup,it has some Indian spices added to it,which makes it even more delicious.
INGREDIENTS:
Ripe Tomatoes 1kilo
Bay leaves 4
Coriander seeds 10grms(2tspns)
Garlic 50Grms
Ginger 20Grms
Sugar 1Tspn
Ginger-Garlic paste 1Tspn
Butter 100Grms
Flour (maida)100Grms
White pepper 1/2Tspn
Coriander leaves
Water 500ml
METHOD
Read More..
INGREDIENTS:
Ripe Tomatoes 1kilo
Bay leaves 4
Coriander seeds 10grms(2tspns)
Garlic 50Grms
Ginger 20Grms
Sugar 1Tspn
Ginger-Garlic paste 1Tspn
Butter 100Grms
Flour (maida)100Grms
White pepper 1/2Tspn
Coriander leaves
Water 500ml
METHOD
- Cut the tomatoes into 4.
- Heat butter and add ginger-garlic paste,coriander seeds and fry.
- Later add bay leaves,tomatoes and keep stirring.
- Add salt and soften the tomatoes.
- Add Flour,sugar and hot water then filter this shorba in a channi(filter).
- Now take a pan put the tomato shorba,add little salt,white pepper and coriander leaves and boil for 5 mins.
Saturday, March 29, 2014
UPDATE Say It With Cupcakes
As many of you know, my birthday is coming up. Ive been making birthday gift suggestions for the past couple of weeks, but truth be told, what I look forward to most are the greeting cards.*

Image via Bella Pillar
What you may not know about me is Im incredibly sentimental. Wait...what does that say? Oh, ha, nevermind, I meant superficial. The point is, Ive been collecting cupcake greeting cards for a while now. The intent was to frame them, but Ive been busy with more important things like painting my nails and washing my hair.
I found out that the artist of most of the cards Ive been collecting are by an artist named Bella Pillar. Youll recognize her from such famous card shops as Papyrus and...nope, just Papyrus. Ive chosen a few of my favorites to inspire. Do with them what you will.**
*LOL, jk.
**Send them to me!!

I gave this one to my friend Meghan for her bday this year.

This card is actually cut out in the shape of the cupcake

I sent out Christmas-themed cupcake cards made by CakeSpy this year--these blank cards would be great any time of year!

Okay, so its not a cupcake, but its a virtual card (i.e., free) about Lady Gaga.
Its basically the next best thing. And you can ALL send me one of these.
Its basically the next best thing. And you can ALL send me one of these.
**UPDATE: Literally, one day after I post this, some company in Ohio unveils this:

Photo via Racked
A greeting card with a cupcake "flavor strip"!!! I will likely die if I dont get one of these on my birthday. Dya hear me?? DIE!!!! Someone send me this stat!!
GLAZED SPUDNUT style DONUTS
For those people who are old enough to know what a Spudnut is...this recipe will be a treat. For those of you too young to remember Spudnuts...lets just say that they were the best donut in the universe. I heard that there are still a few Spudnut shops around, but it appears that they are few and far between.
This recipe (from the Idaho Potato Commission) makes a LOT of Spudnut-style donuts (about 4 dozen) so you might want to half the recipe if you decide to make them. If you are not experienced with yeast doughs, I dont recommend trying this recipe, however, if you have had even moderate success with yeast doughs, I hope you give the recipe a try (it is not a hard recipe at all).
The donuts are very moist, sweet and have just a HINT of lemon. My hubby is a donut (and Spudnut) connoisseur from way back, and he gave these donuts two thumbs up!!
 2 pkgs. dry yeast
1/2 cup warm water
1 cup sugar
3/4 cup shortening (do not use butter)
1 & 1/2 cups cold instant mashed potatoes
3 eggs well beaten
2 cups scalded milk (cooled to luke warm)
1 tablespoon salt
1 tablespoon lemon extract
6 to 8 cups all purpose flour
Dissolve the yeast in the warm water and set aside. Cream the sugar and shortening and beat in the cold potatoes, eggs, cooled milk, yeast water, salt and lemon extract. Gradually add the flour to make a soft dough, knead well. The dough will be quite sticky, but holds together well. It should be a softer dough than bread dough and should look like this:
 Cover dough with plastic and let it raise in a warm place until doubled in size (this takes a huge bowl and about an hour). After an hour, pull dough out of bowl and onto the counter. Sprinkle with flour and knead it a little to get most of the air out of it. If dough seems really sticky, just flour your board. Roll the dough out to a half inch thickness. Cut with well-floured cutter:
 Spray a piece of parchment paper (or waxed paper) with a little vegetable spray and then wipe it down with a paper towel. Cut the paper into squares and put a cut out donut on each square. This will help you when it is time to transfer the raised donuts from the counter to the hot oil (see notes).
 Let the doughnuts raise until they get nice and puffy, then
Read More..
This recipe (from the Idaho Potato Commission) makes a LOT of Spudnut-style donuts (about 4 dozen) so you might want to half the recipe if you decide to make them. If you are not experienced with yeast doughs, I dont recommend trying this recipe, however, if you have had even moderate success with yeast doughs, I hope you give the recipe a try (it is not a hard recipe at all).
The donuts are very moist, sweet and have just a HINT of lemon. My hubby is a donut (and Spudnut) connoisseur from way back, and he gave these donuts two thumbs up!!
CLICK ON THIS PHOTO
 2 pkgs. dry yeast
1/2 cup warm water
1 cup sugar
3/4 cup shortening (do not use butter)
1 & 1/2 cups cold instant mashed potatoes
3 eggs well beaten
2 cups scalded milk (cooled to luke warm)
1 tablespoon salt
1 tablespoon lemon extract
6 to 8 cups all purpose flour
Dissolve the yeast in the warm water and set aside. Cream the sugar and shortening and beat in the cold potatoes, eggs, cooled milk, yeast water, salt and lemon extract. Gradually add the flour to make a soft dough, knead well. The dough will be quite sticky, but holds together well. It should be a softer dough than bread dough and should look like this:
 Cover dough with plastic and let it raise in a warm place until doubled in size (this takes a huge bowl and about an hour). After an hour, pull dough out of bowl and onto the counter. Sprinkle with flour and knead it a little to get most of the air out of it. If dough seems really sticky, just flour your board. Roll the dough out to a half inch thickness. Cut with well-floured cutter:
 Spray a piece of parchment paper (or waxed paper) with a little vegetable spray and then wipe it down with a paper towel. Cut the paper into squares and put a cut out donut on each square. This will help you when it is time to transfer the raised donuts from the counter to the hot oil (see notes).
 Let the doughnuts raise until they get nice and puffy, then
deep fry the donuts in 375 degree vegetable oil until they are deep golden (mine took about 2 minutes a side). Only fry two or three donuts at a time.
Drain on paper towels. Glaze while still warm
CLICK ON THIS PHOTO FOR BREAKFAST
 GLAZE
GLAZE

And dont forget the donut holes!!!

NOTE: Recipe calls for shortening, I used butter flavored Crisco.
Drain on paper towels. Glaze while still warm
CLICK ON THIS PHOTO FOR BREAKFAST
GLAZE1 pound of sifted powdered sugar
1 tablespoon of vanilla extract
Whisk in enough boiling water to make a thin glaze, drizzle over donuts.
And dont forget the donut holes!!!
NOTE: Recipe calls for shortening, I used butter flavored Crisco.
NOTE: Recipe calls for prepared instant potatoes. I prepared my potatoes per the box instructions including water, milk, butter and salt.
NOTE: Recipe calls for a tablespoon of lemon extract. That sounds like a lot, but it leaves just a tiny HINT of lemon flavor in the final product.
NOTE: Recipe calls for 6-8 cups of flour. I used all 8 cups and it was no where near as "solid" as bread dough, so expect a sticky dough.
NOTE: I let my donuts raise on squares of sprayed parchment paper. If you do that, then you can pick up the donut without deforming or deflating it and gently turn it over in your hand and gently peel off the paper before you ease the donut into the hot oil.
NOTE: I have a 2" donut cutter, but it just seemed to make a very tiny donut, so I cut the bottom and top out of a pineapple can and used that as my cutter. I cut out the center of the donut with a tiny cookie cutter.
NOTE: I used my smallest electric frying pan with 3" of vegetable oil to fry these donuts. The electric fry pan allows you to easily adjust the oil to 375 degrees and since you should only fry two or three donuts at a time, the smaller electric fry pan makes sense.
NOTE: I used my smallest electric frying pan with 3" of vegetable oil to fry these donuts. The electric fry pan allows you to easily adjust the oil to 375 degrees and since you should only fry two or three donuts at a time, the smaller electric fry pan makes sense.
Shrimp Stew Karides Güveç

This is a family recipe that I wanted to post here for a long time, but it is so tasty that I usually never have a chance to photograph it. Here we go
serves 6
1 or 2 lb raw, peeled shrimp (use 2 lb if you are having company)
1 onion, finely chopped
4-5 cloves of garlic, finely chopped
3 tbsp olive oil
2 green pepper, chopped
2 red peppers, chopped
sliced white mushroom (use as much as you want)
3-4 tomatoes, diced (if you will use canned diced tomato, put it in a blender)
4 bay leaves
1/2 bunch parsley, finely chopped
1 -2 cups of grated mozzarella cheese
salt and pepper
optional: crushed red pepper flakes

-Heat oil in a broad pot. Cook onion and garlic until soft.
-Add peppers. Stir for 2 minutes.
-Add mushroom. Cook until almost soft.
-Stir in tomato. If the tomatoes you are using are not very juicy, add some water to barely cover the vegetables and mushroom.
-Cover and cook for 5-8 minutes until tomato is cooked.
-Stir in shrimps. Cover and cook for 5-6 minutes. Not more!
-Add parsley.
-Divide it into individual oven safe soup bowls or souffle dishes, or put the whole stew in a big one. Bake at 350F for 15-20 minutes.
-After 20 minutes cover each with grated mozzarella and bake until golden brown.
-Serve with white rice.
Friday, March 28, 2014
Late Summer Haiku Challenge
To me, the photo below really captures what this time of year looks and feels like. It also inspired the following haiku. There is something enigmatic about the haiku. Its strict 5-7-5 syllable structure somehow bringing an openness to the poem. I look forward to reading your submissions.
Peaches wait for fall,
Getting sweeter all the time,
Moving into earth.

Read More..
Peaches wait for fall,
Getting sweeter all the time,
Moving into earth.
The award goes to

Many thanks to my new friend Lucy from Sweets, Savories, Etc. for nominating me for the Brilliant blog award!
As you know Im brand spanking new to all the ins and outs of blogging but Ive learned that there are some rules I need to follow regarding the award. Sorry Lucy, that it took me so long to post this...Im slow...but Im learning! :-)
Here are the rules...(taken from Lucys blog)
1. Add the logo to my blog.
2. Add a link to my new friend who gave me the award.
3. Nominate other blogs.
4. Add links to their blogs.
5. Leave a message on their blogs to let them know they have been tagged!
There are so many blogs that Ive started reading and they are all so great! I want to pass this on to everyone, however, I will stop at three!
I am tagging...
Shane from Culinary Alchemist - Hes the Alton Brown of Bakespace!
Sophie from Flour Arrangements - Her blog is the first I ever read!
Jonny and Nikki from Sunday Sauce - Their blog makes me think of home!
Chicken Enchiladas


I spent the better part of yesterday at the South Bend Farmers Market scouring the vendors for some goodies that would inspire my dinner. I was delighted to find many fabulous unique items as well as the tried and true standards. Among them was one of my favorite things in world and, unfortunately, here in Northern Indiana I do not often come by hand made corn tortillas....still warm and fragrant in the package! Immediately, I anticipated the chicken enchiladas I was going to prepare for dinner.
To prepare the enchilada sauce I sauteed 1/2 a small sweet onion, medium dice and two minced cloves of garlic in about two tablespoons of canola oil until translucent. Add 1-2 tablespoons of flour and several tablespoons of chili powder (I used the same blend I made a few weeks ago from dried chipotle and ancho chilis for a baby back rib rub - see March 7 entry) depending on the heat of the chilis and the degree of heat you desire. Add 1-2 teaspoons of cumin and stir continuously for about 5 minutes. Add 1 can of unseasoned tomato puree and 1/2 can of water and bring to a boil. Add a teaspoon of sugar, a teaspoon of salt and pepper to taste and let simmer for 10-15 minutes, adding more water if sauce appears too thick.
In a mixing bowl, combine shredded chicken, enough enchilada sauce to coat, but not too much, and some cheese of your choice. (I used mild cheddar because thats what I had on hand, but a mexican melting cheese would be great or even Monterey Jack).
To heat the tortillas, coat both sides with the enchilada sauce and heat in a skillet with little bit of oil until pliable, just a few seconds on each side. Place a few tablespoons of the chicken mixture on the tortillas, roll them up and place them in a baking dish, seam side down. Top the enchiladas with the remaining sauce and top with cheese. Bake in a 350 degree oven for about 20 minutes until bubbly and heated through.
Serve with shredded lettuce seasoned with a little bit of vinegar (no oil) and salt. Top with sour cream, guacamole and cilantro, if desired.
Thursday, March 27, 2014
Salima Murghi
Salima Murghi

Ingredients
- Chicken 1 kg 16 pieces
- Ginger garlic 2 tbsp
- Chili powder 2 tsp
- Salt 1 ½ tsp
- Bay leaf 1
- Onion 2 large sliced
- Cinnamon 2 pieces
- Turmeric ¼ tsp
- Cumin roasted and crushed 1 tsp
- Ketchup 4 tbsp
- Yogurt ½ cup
- Cream 2 tbsp
- Potato straws (salli) 1 cup
- Oil ½ cup
Method
- In a bowl mix together ketchup, yogurt and cream and keep aside.Marinate chicken with ginger garlic paste for 1 hour, heat oil in a wok and fry onions till they turn light golden.
- Add cinnamon and bay leaf, fry for a few seconds then add chili powder, salt, turmeric, cumin and chicken, fry for 10 minutes.
- Add 1 cup water, cover pan and simmer till the chicken tender, lastly fold in ketchup, yogurt and cream mixture and cook for 5 minutes.
- Remove in a serving platter, garnish with potato straws serve with roti or paratha.
Orange Crème Anglaise – Not a Day Late but 364 Days Early!

In that version I said to use medium-low heat, but it’s probably best to go for something a little closer to medium. I was erring on the side of safety, but it does take a while to come up to temperature, so don’t be afraid to crank the heat up a little if you’re feeling impatient. Unless you let this simmer, which you aren’t going to do, you shouldn’t really have a problem with scrambled eggs.
I also remembered I like to stir a teaspoon of Grand Marnier into the finished, cooled sauce for a little extra orange kick. Any time you heat a liqueur, the alcohol will evaporate, which does change the flavor. By adding a bit at the end, we get that wonderful orange cognac flavor in all its undiminished glory. I hope you give this easy, incredibly delicious, and versatile dessert sauce recipe a try soon. Enjoy!
Crème Anglaise Sauce:
(Makes about 1 cup)
1 cup heavy cream
1/3 cup white sugar
2 large egg yolks
1/4 tsp vanilla extract
1 tbsp Grand Marnier
Once sauce is cooled, add:
1 tsp freshly grated orange zest
1 tsp Grand Marnier, stirred into cold sauce
View the complete recipe
View the complete recipe
Slow Baked Sausages Dish of the Month

Nigel suggests serving the sausages with mashed potatoes, but I served my sausage dish with roasted and mashed butternut squash and some fresh green broccoli as a bit of a contrast. The rich beery gravy worked really well with the sweet butternut squash and the sausages were tender and meaty. Another big success from Mr Nigel Slater! Im really looking forward to watching him with Countryfile favourite, Adam Henson, on BBC 1 from 20th November for Nigel and Adams Farm Kitchen.

- Make a Dish of the Month from ANY recipe by Nigel Slater
- Link to Farmersgirl Kitchen or A Little Bit of Heaven on a Plate
- Use the Dish of the Month logo in your post
- If you use twitter, tweet your post with @FarmersgirlCook or @Heavenona_plate and #DishoftheMonth and we will re-tweet it to our followers.
- If you own The kitchen diaries II please do not publish the recipes on your blog without permission, they are copyright.
- If you are using recipes from the BBC Food website, please link to the recipe on BBC Food rather than publishing the recipe. Likewise recipes on the Guardian Lifestyle website.
- One entry per blog.
- Recipes must be added to the linky by the 28th of each month.
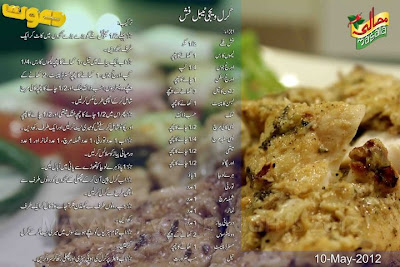
Grill Vegetable Fish
Grill Vegetable Fish
Ingredients
Read More..
Ingredients
- Fish fillet ½ kg
- Lemon juice 1 tbsp
- Orange juice ¼ cup
- Orange skin 1 tsp
- Olive oil 3 tbsp
- Salt to taste
- Garlic paste 1 tbsp
- Black pepper powder ½ tsp
- White pepper powder ¼ tsp
- Dry Fenugreek leaves ½ tsp
- Oregano ½ tsp
- Green beans 250 gm
- Ridge gourd 1
- Capsicum 1
- Tomato 1
- Onion 1
- Worchester shire sauce 2 tbsp
- Mustard paste 1 tbsp
- Oil as required
- Cut ½ kg fish into large cubes, keep aside.In a bowl mix together oil, 1 tbsp lemon juice, ¼ orange juice, 1 tbsp mustard paste, 2 tbsp Worchester shire sauce, salt to taste and ½ tsp black pepper. Mix well. Add in ½ tsp dry fenugreek leaves and ½ tsp oregano.
- Marinate fish with the paste and keep aside. Finely chop 1 ridge gourd, 1 capsicum, 1 tomato and 1 onion. Boil 250 gm green beans and keep aside.
- Cook marinated fish in a grill pan, cook till golden brown from both sides. Dip chopped vegetables and boiled green beans in leftover sauce. Cook in grill pan for few minutes. Put grilled fish in a serving platter, garnish with frilled vegetable and serve hot.
Wednesday, March 26, 2014
Flaky Cream Cheese Filled Pastry Hearts

These delicious, easy hand pies have a crisp, buttery puff pastry shell thats filled with warm cream cheese filling. Good idea to make for valentines day.
Ingredients: 
Make 1/2 of Quick Pastry Puff Dough Recipe
For the filling:
8 oz cream cheese
2 eggs
1/2 to 3/4 cup sugar
1 cup ricotta or Homemade Farmers cheese or add 8 oz more cream cheese instead of ricotta.
1 tsp vanilla
1 egg for covering the tops
Preheat oven to 425 F.


Enjoy!!!

Sugar Magnolia Snap Peas

Those, my friends, are snap peas. The ones on the left are Sugar Magnolia snap peas; I dont know what the name of the ones on the right is, but they are either also Sugar Magnolia peas or a related variety bred by Alan Kapuler of Peace Seeds. Heres the description from his blog:
Pisum sativum Sugar Magnolia Purple Snap Vine Pea 25/5.00 Vigorous vines with purple flowers and purple 3-4” snap pods of fine flavor. This year’s seed stock has a mixture of tendril types: regular, hypertendril and vetch (no tendrils). Unexpectedly, the cross of a Parsley Bush Pea with a Purple Podded Snap Vine Pea generated a hypertendril trait. Hypertendrils are very distinctive, they hold a population of vine peas together, a useful self-supporting characteristic.
I did not get my seeds directly from Peace Seeds, but from a friend who generously passed some along to me. Mine appear to be the regular tendril variety. The peas I received also appear to be a mix of Alan Kapulers snap pea strains, but the true purple Sugar Magnolia are the most beautiful and also, I am happy to say, the best tasting and most tender. I will be selecting for the most purple podded plants to grow out next year.
They are not as good tasting as Amish Snap - nothing is - but they are very pleasant peas and the astonishing colour actually survives cooking! Pretty much unheard of, in purple podded beans and peas. As such, I intend to continue to grow them regularly to use as a garnish and point of colour in spring vegetable dishes, which otherwise tend towards the purely green. You can see them, cooked, in this dish of Peas & Cheese.

They are very attractive as plants, and the peas can get quite big before becoming too tough to eat. This is another bonus, as it means they have a range of several days that they will hold on the plant. One of the tedious parts of early summer is having to get out there and pick peas, Every. Single. Day. If not twice!

When Alan Kapuler says "vigorous vines" this is what he means. Even in this dry, hot year they have reached the top of our 7 trellis and are not done yet. Note too, that my assessment of their flavour and lasting qualities was made this year, and they are likely to do even better in a year thats kinder to peas. I took these photos during last weeks heatwave, so they, like all the peas, stopped blooming and there are no flowers to be seen. However, they have very pretty flowers, in 2 tones of purple.
Im afraid these will be very hard peas to find. I am aware of only one company in Canada that sold them this year, and that was Richters, as part of their Seed Zoo. Thats a brutally expensive way to get seed, but on the bright side peas are amongst the easiest of vegetables to grow out and save seed from. They describe theirs as the hypertendril strain.
Green Split Pea Soup

This is one of my almost Turkish recipes. It was inspired by Turkish lentil soup (Mercimek Corbasi).
1 cup green split peas
1/4 cup white rice
1 onion
1 bell pepper or banana pepper
1 potato
1 carrot
2 cloves of garlic
1 tsp mint (fresh or dried)
1/2 tsp black pepper
1 tbsp olive oil or butter
salt
7-8 cups of water

optional:
curry
gren chili
turmeric
parsley
dill
You can replace green split peas with yellow split peas or yellow lentils.
There are different ways to make this soup. You can use a pressure cooker or a regular pot, and you can use a food processor/a hand blender or grate / chop finely all the ingredients.
1-If you have a pressure cooker and a blender, put everything in the pressure cooker and cook first on high and then low heat for 20 minutes. Then use the blender to smoothen the soup.
If you wont use a blender, then grate or chop finely everything before you cook them.
2-If you want to use a regular pot, put everything in the pot and cook until the peas are soft. Again you can either smoothen the soup with a blender after its cooked or grate or chop everything beforehand.
Squeeze a little bit of lemon or lime juice before you eat.
Tuesday, March 25, 2014
Fascinating Fascinators
While Im not generally interested in anything Royal, Kate Middleton is really doing her damnedest to BRING IT. Its getting hard to ignore, especially when she starts rocking one of fashions long-forgotten accessories, the fascinator.

Oh sure, Damon Wayons tried to bring it back in the early 90s, but for some reason his portrayal of a gay film critic for In Living Colors "Men on Film" just didnt do the trick:


Read More..
Oh sure, Damon Wayons tried to bring it back in the early 90s, but for some reason his portrayal of a gay film critic for In Living Colors "Men on Film" just didnt do the trick:
{This is a Thanksgiving fascinator, obvi}
But now that the fascinator has finally gotten a little validity from Kate and even fashion daredevil SJP, theyre popping up in all shapes, sizes and prices! Most of the really good, unique ones are still in the UK, but no doubt well see a lot of knock-offs showing up in the likes of Forever21 over the next few months. And thats how youll know to stop wearing them.
These are the ones that have caught my eye:
These are the ones that have caught my eye:
{Itd be fair to say I have a thing for feathers}
1. Mayfair Sapphire Fascinator, £85
2. Mae Feather Fascinator, £75
3. Philip Treacy Warhol mouths Fascinator
4. Lucie Fascinator, £99.00
5. Etsy, Ring Leader Top Hat, $249
Subscribe to:
Comments (Atom)